Photo by Benjamin Davies on Unsplash
You don't need secrets to deploy to Azure from GitHub Actions 🤯
Connecting your GitHub Workflows to Azure AD using OpenID Connect
I've been using GitHub a lot more lately for CI/CD. I have a background with Azure DevOps, so seeing the differences and similarities is fun. Because GitHub doesn't have a concept like "Azure DevOps Service Connections," the primary way I have been using to deploy to Azure is through service principals with good ol' Client ID and Client Secret. But, there's a better way - a way where you don't have to keep a Client Secret. Instead, you establish a trust relationship between your GitHub repository and an Azure Active Directory (AAD) application.
Background
One of the most straightforward ways to deploy Azure is through a service principal.
az login --service-principal -u <aad app registration client id> -p <<aad app client secret>> --tenant <<aad tenant id>>
# now you can invoke az commands
The problem with this is:
- You have to store that secret in your CI/CD system safely. Sure, you could integrate with KeyVault, but your mileage may vary depending on your CI/CD system.
- Typically, client secrets expire. When creating the client secret, you can choose varying expiration timeframes, but you have to keep track of when these secrets expire. It's annoying when deployments stop working because the service principal has passed. And, if you don't choose an expiration, you're opening yourself up for a security incident.
Alternatively, you can authenticate with a service principal using a certificate.
az login --service-principal -u <aad app registration client id> -p <<certificate>> --tenant <<aad tenant id>>
# now you can invoke az commands
The problem with this is:
- You have to use self-hosted runners. And, you have to install the certificates on those runners. And, certificates do expire, ugh.
Azure Active Directory and GitHub OIDC Integration!
There's documentation on both the GitHub and the Microsoft side. I found the documentation on the Microsoft side to be a little more useful.
I used this walkthrough as described by Microsoft.
The app registration with federation
I won't re-document everything. From Azure AD, you create an app registration like you would normally do. Then instead of setting up the client secret, you set up a federated credential.
Sign in to the Azure portal. Go to App registrations and open the app you want to configure.
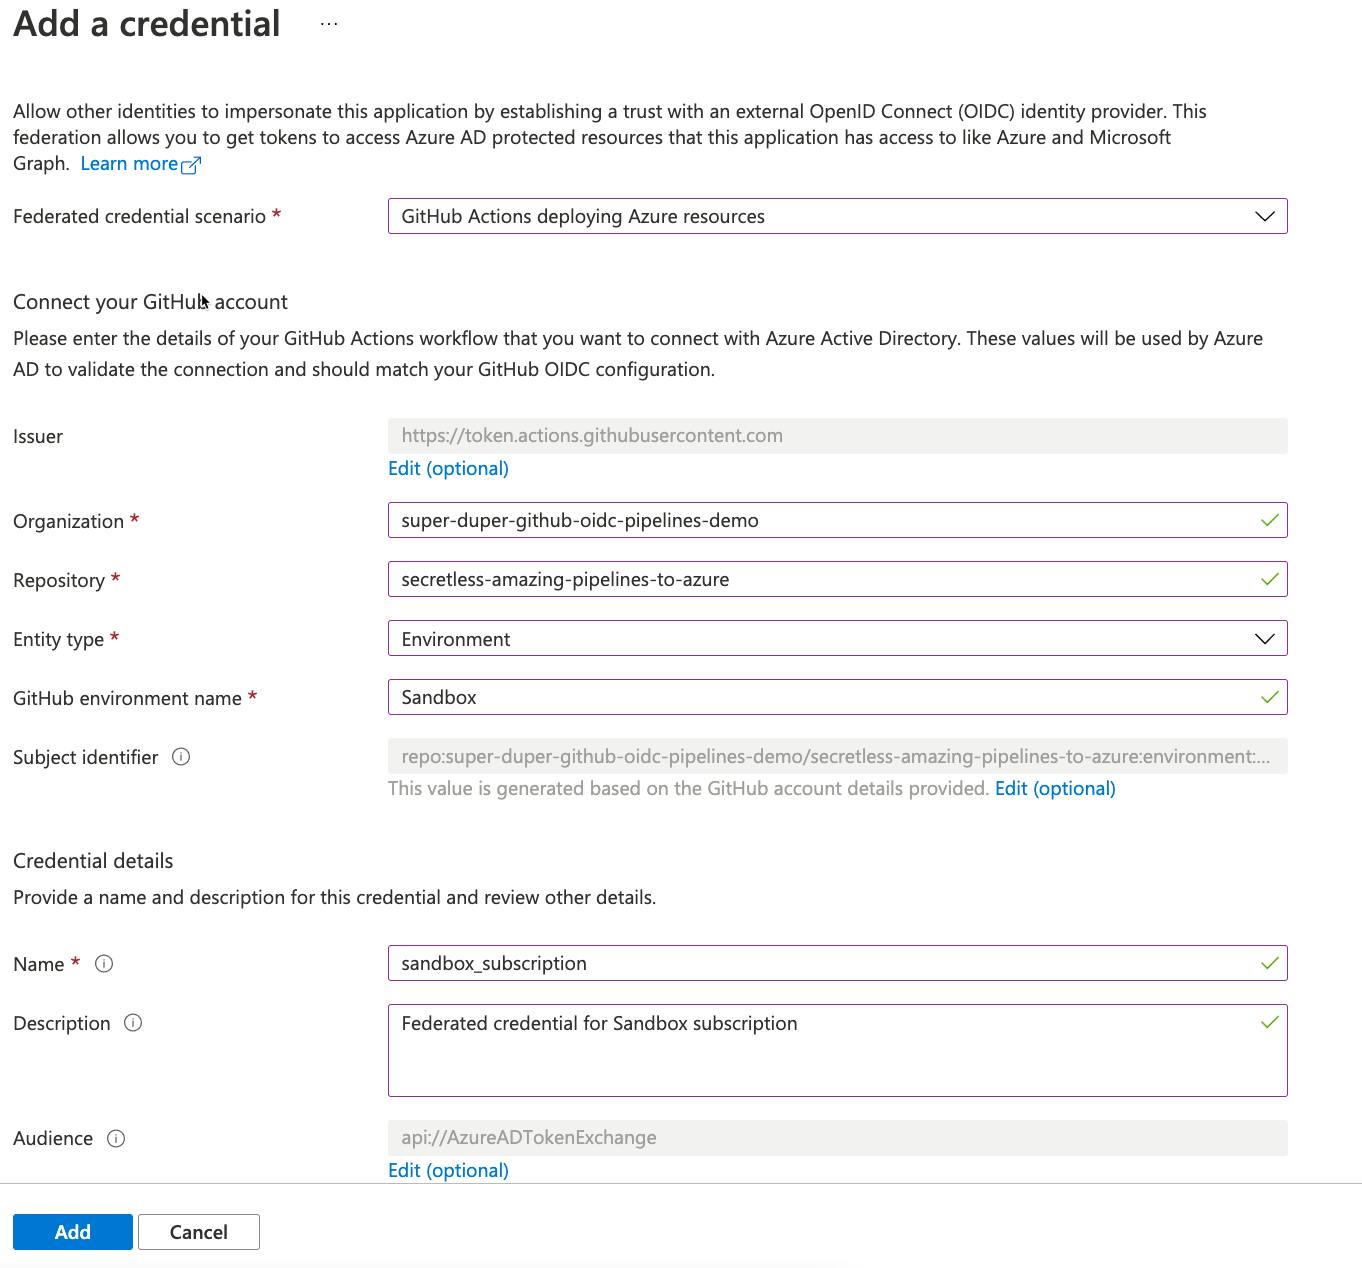
Go to Certificates and secrets. In the Federated credentials tab, select Add credential. The Add a credential blade opens.
In the Federated credential scenario drop-down box select GitHub actions deploying Azure resources.
Specify the Organization and Repository for your GitHub Actions workflow.
For Entity type, select Environment, Branch, Pull request, or Tag and specify the value. The values must exactly match the configuration in the GitHub workflow. For more info, read the examples.
Add a Name for the federated credential.
The Issuer, Audiences, and Subject identifier fields autopopulate based on the values you entered.
Click Add to configure the federated credential.

Here's my parameters:
- Organization -
super-duper-github-oidc-pipelines-demo - Repository -
secretless-amazing-pipelines-to-azure - Entity type -
Environment - GitHub environment name -
Sandbox - Name -
sandbox_subscription
💡 What's neat about this step is that the person performing the registration does not need access to GitHub at all! Great for those enterprise scenarios where you have to do a screen share with an AAD admin.
Next, grant this new app registration Reader role to the Azure subscription that you'll be using. In reality, you will probably need a different role based on what you're trying to automate. But, this does mean that you need to have Owner role of the subscription or User Access Administrator. If you're neither of these things, you'll need someone else to help you. If you need help with this, here's the docs.
Now, to the GitHub side of things.
The GitHub side of things
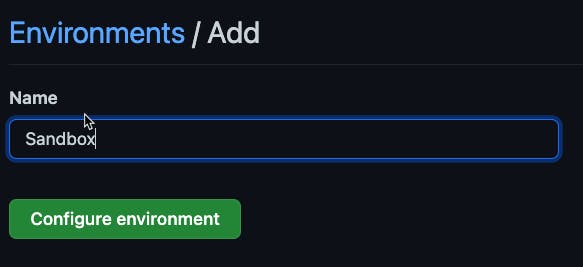
Under my repository, I configured an environment called Sandbox. To add a new environment you go to Repository Settings, Environments, then add the new environment.

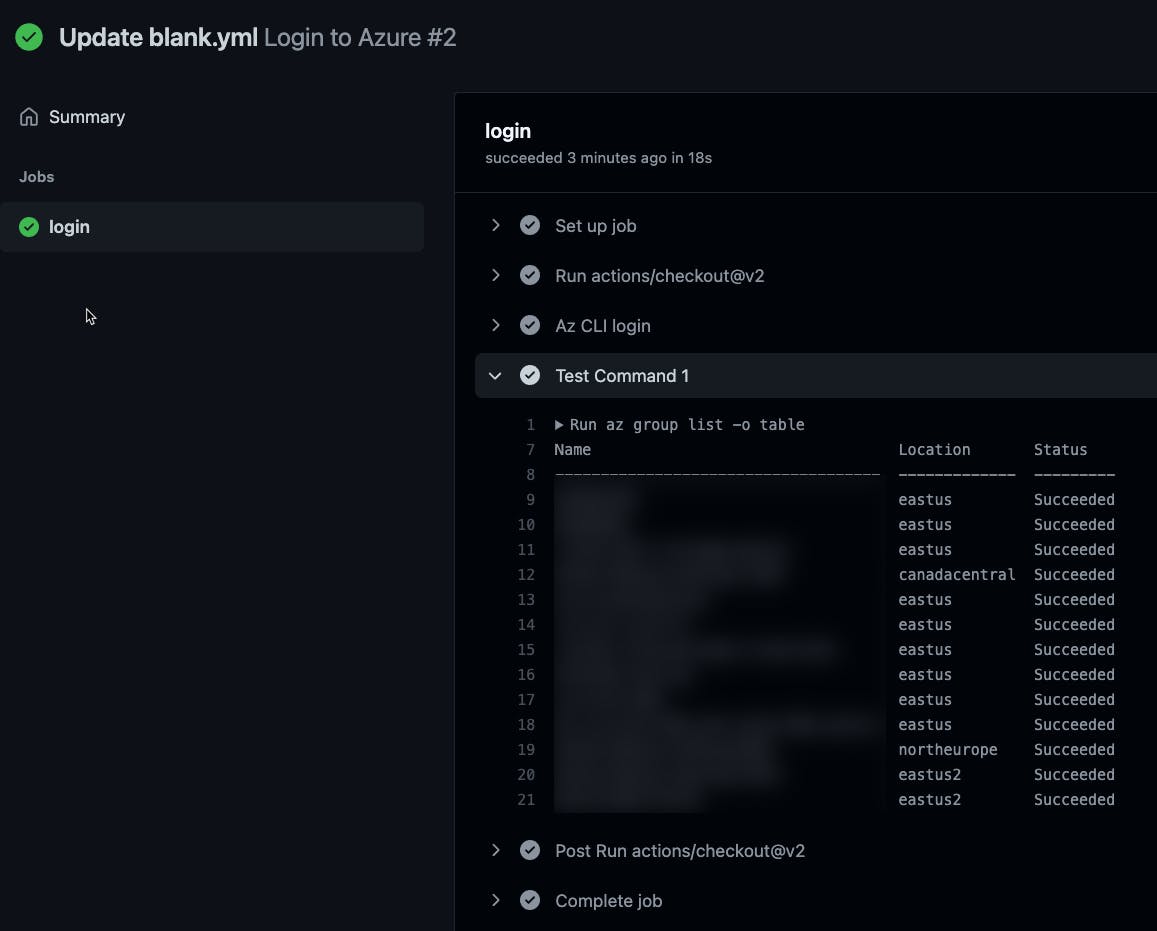
Next, we'll create a GitHub action that leverages the OIDC capability. To verify that we can login to Azure, we'll add a step to list all the resource groups in the subscription.
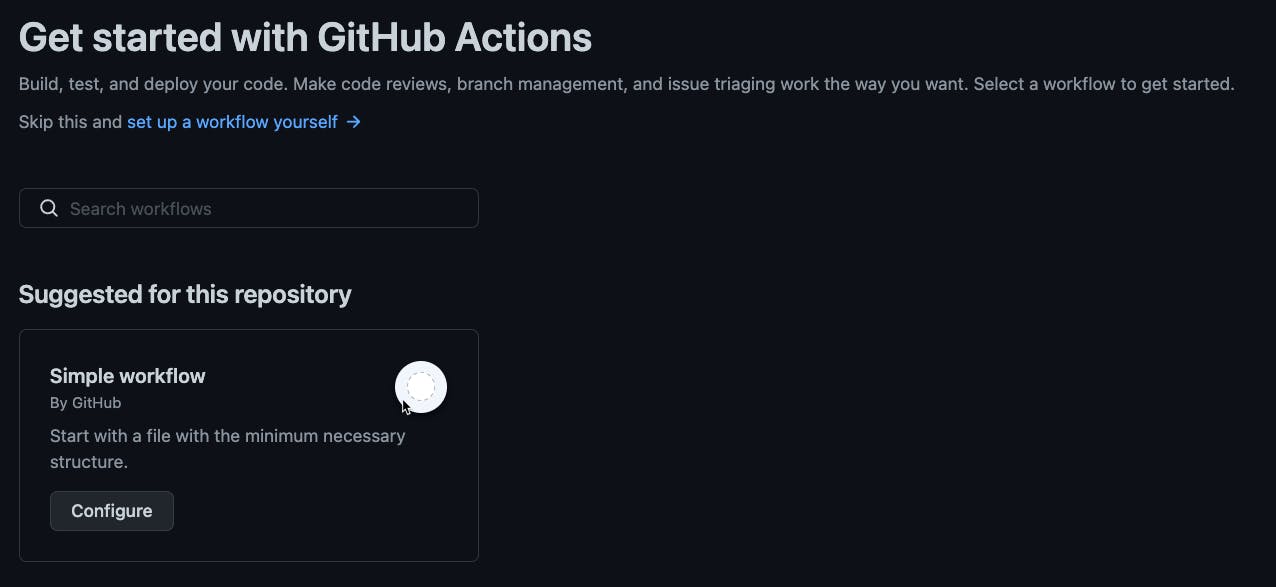
So, start with a simple workflow.

Now replace the contents with the following pieces.
The next bits of the process has been derived from the GitHub Action for Azure Login README.
First, you need to grant permissions to the action to read the OIDC ID Token from Azure AD. Add a permissions block at the workflow level (at the same indentation level as the name of the workflow).
permissions:
  id-token: write
  contents: read
And, you'll want to create a simple job that deploys to the Sandbox environment.
jobs:
  login:
    runs-on: ubuntu-latest

    environment: Sandbox

    steps:
      - uses: actions/checkout@v2
Next, you'll want a step your action to login to Azure. Notice how it doesn't use a secret. 🙃
- name: 'Az CLI login'
   uses: azure/login@v1
   with:
     client-id: <<your client id for the app registration you created above>>
     tenant-id: <<the tenant id for aad>>
     subscription-id: <<the subscription id>>
Then, we'll add a step to run a test command to verify that we can authenticate.
- name: Test Command 1
   shell: bash
   run:
     az group list -o table
Putting it all together
name: Login to Azure

permissions:
  id-token: write
  contents: read

on:
  push:
    branches: [ main ]

jobs:
  login:
    runs-on: ubuntu-latest

    environment: Sandbox

    steps:
      - uses: actions/checkout@v2

      - name: 'Az CLI login'
        uses: azure/login@v1
        with:
          client-id: <<your client id for the app registration you created above>>
          tenant-id: <<the tenant id for aad>>
          subscription-id: <<the subscription id>>

      - name: Test Command 1
        shell: bash
        run:
          az group list -o table
Then, notice how your mind melts with awe. 🤯


